Getting started with MCP
This tutorial walks you through connecting Claude Code (CLI) to the Power MCP service, authenticating with an API key, and running your first WordPress tool.
What you’ll build
Section titled “What you’ll build”By the end of this tutorial, you’ll have:
- Configured Claude Code CLI to connect to the Power MCP service
- Authenticated with a personal API key
- Listed your WordPress sites
- Run a WordPress ability on a connected site
Prerequisites
Section titled “Prerequisites”- Claude Code CLI installed (download here)
- A WP Engine account with at least one WordPress site
- Power console access to create API keys
- 10 minutes
Step 1: Create a personal API key
Section titled “Step 1: Create a personal API key”The MCP server requires a personal API key (not a project key) to execute WordPress abilities on your behalf.
- Sign in to the Power console
- Select your project from the project picker
- Navigate to API keys → Create key
- Choose Personal key as the key type
- Set permissions to include the MCP scope (or use “All permissions” for testing)
- Copy the key value — it starts with
wpe_and is shown once
Store your key securely
Save the key in a password manager immediately. The Power console never re-displays it.

Step 2: Configure Claude Code
Section titled “Step 2: Configure Claude Code”Run this command to add the Power MCP service:
claude mcp add --transport http coworker \ https://api.ai.wpengine.com/v1/mcp \ --header "Authorization: Bearer YOUR_API_KEY_HERE"Replace YOUR_API_KEY_HERE with the key you copied in Step 1.
Using Claude Desktop instead? See Configure Claude Desktop.
Step 3: Verify the connection
Section titled “Step 3: Verify the connection”Start a new Claude Code session and ask:
claude "Use the coworker MCP server to list my WordPress sites"Claude will call the list_account_sites tool and return your active registered sites.
Expected response:
You have 3 WordPress sites connected:1. example.com (example-prod) - Active2. staging.example.com (example-staging) - Active3. dev.example.com (example-dev) - ActiveStep 4: Connect your WordPress account
Section titled “Step 4: Connect your WordPress account”This step is only needed to run abilities or manage a site — which is what the rest of this tutorial does. Listing sites and searching a knowledge base work without it.
Complete the connection once per site.
- Ask Claude: “What’s the WordPress connection status for my sites?”
- For any site that isn’t showing “Connected”, follow the link to complete the consent flow in WordPress admin
- Authorize the Power gateway to act on your behalf
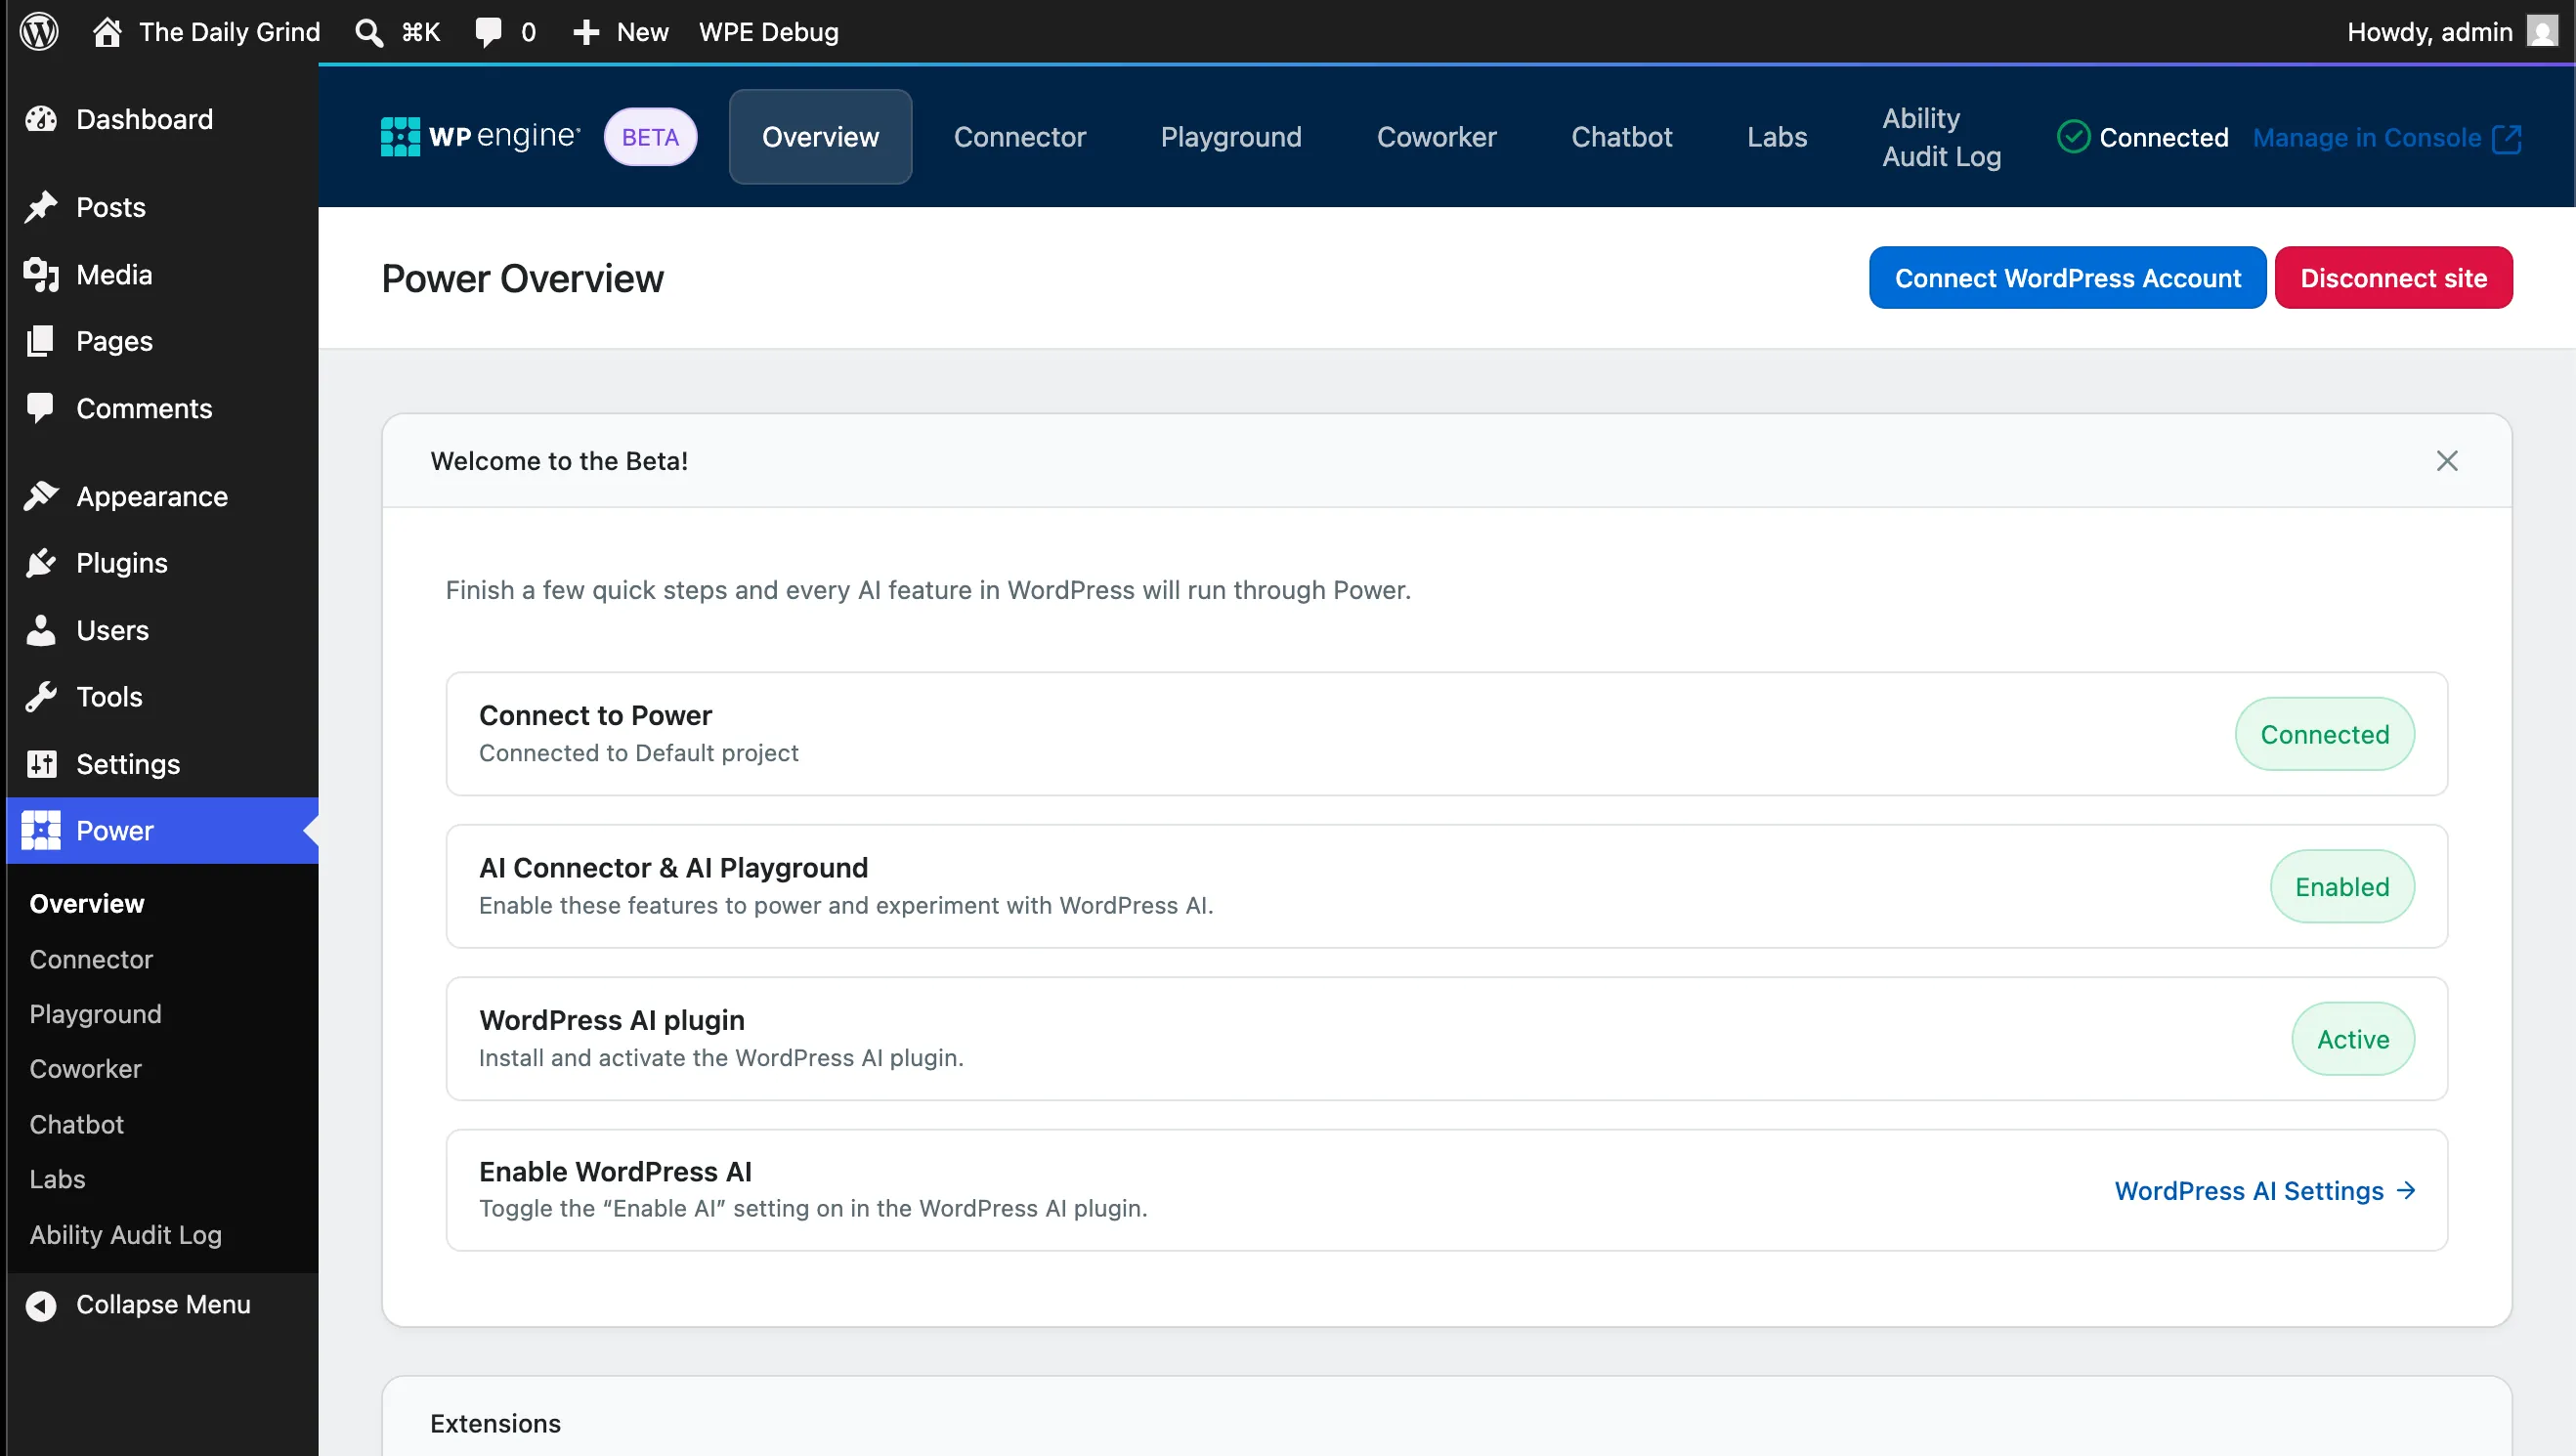
This one-time setup grants the MCP server permission to execute abilities (create posts, manage plugins, etc.) as your WordPress user.
Step 5: Run your first ability
Section titled “Step 5: Run your first ability”Now that your WordPress account is connected, run an ability:
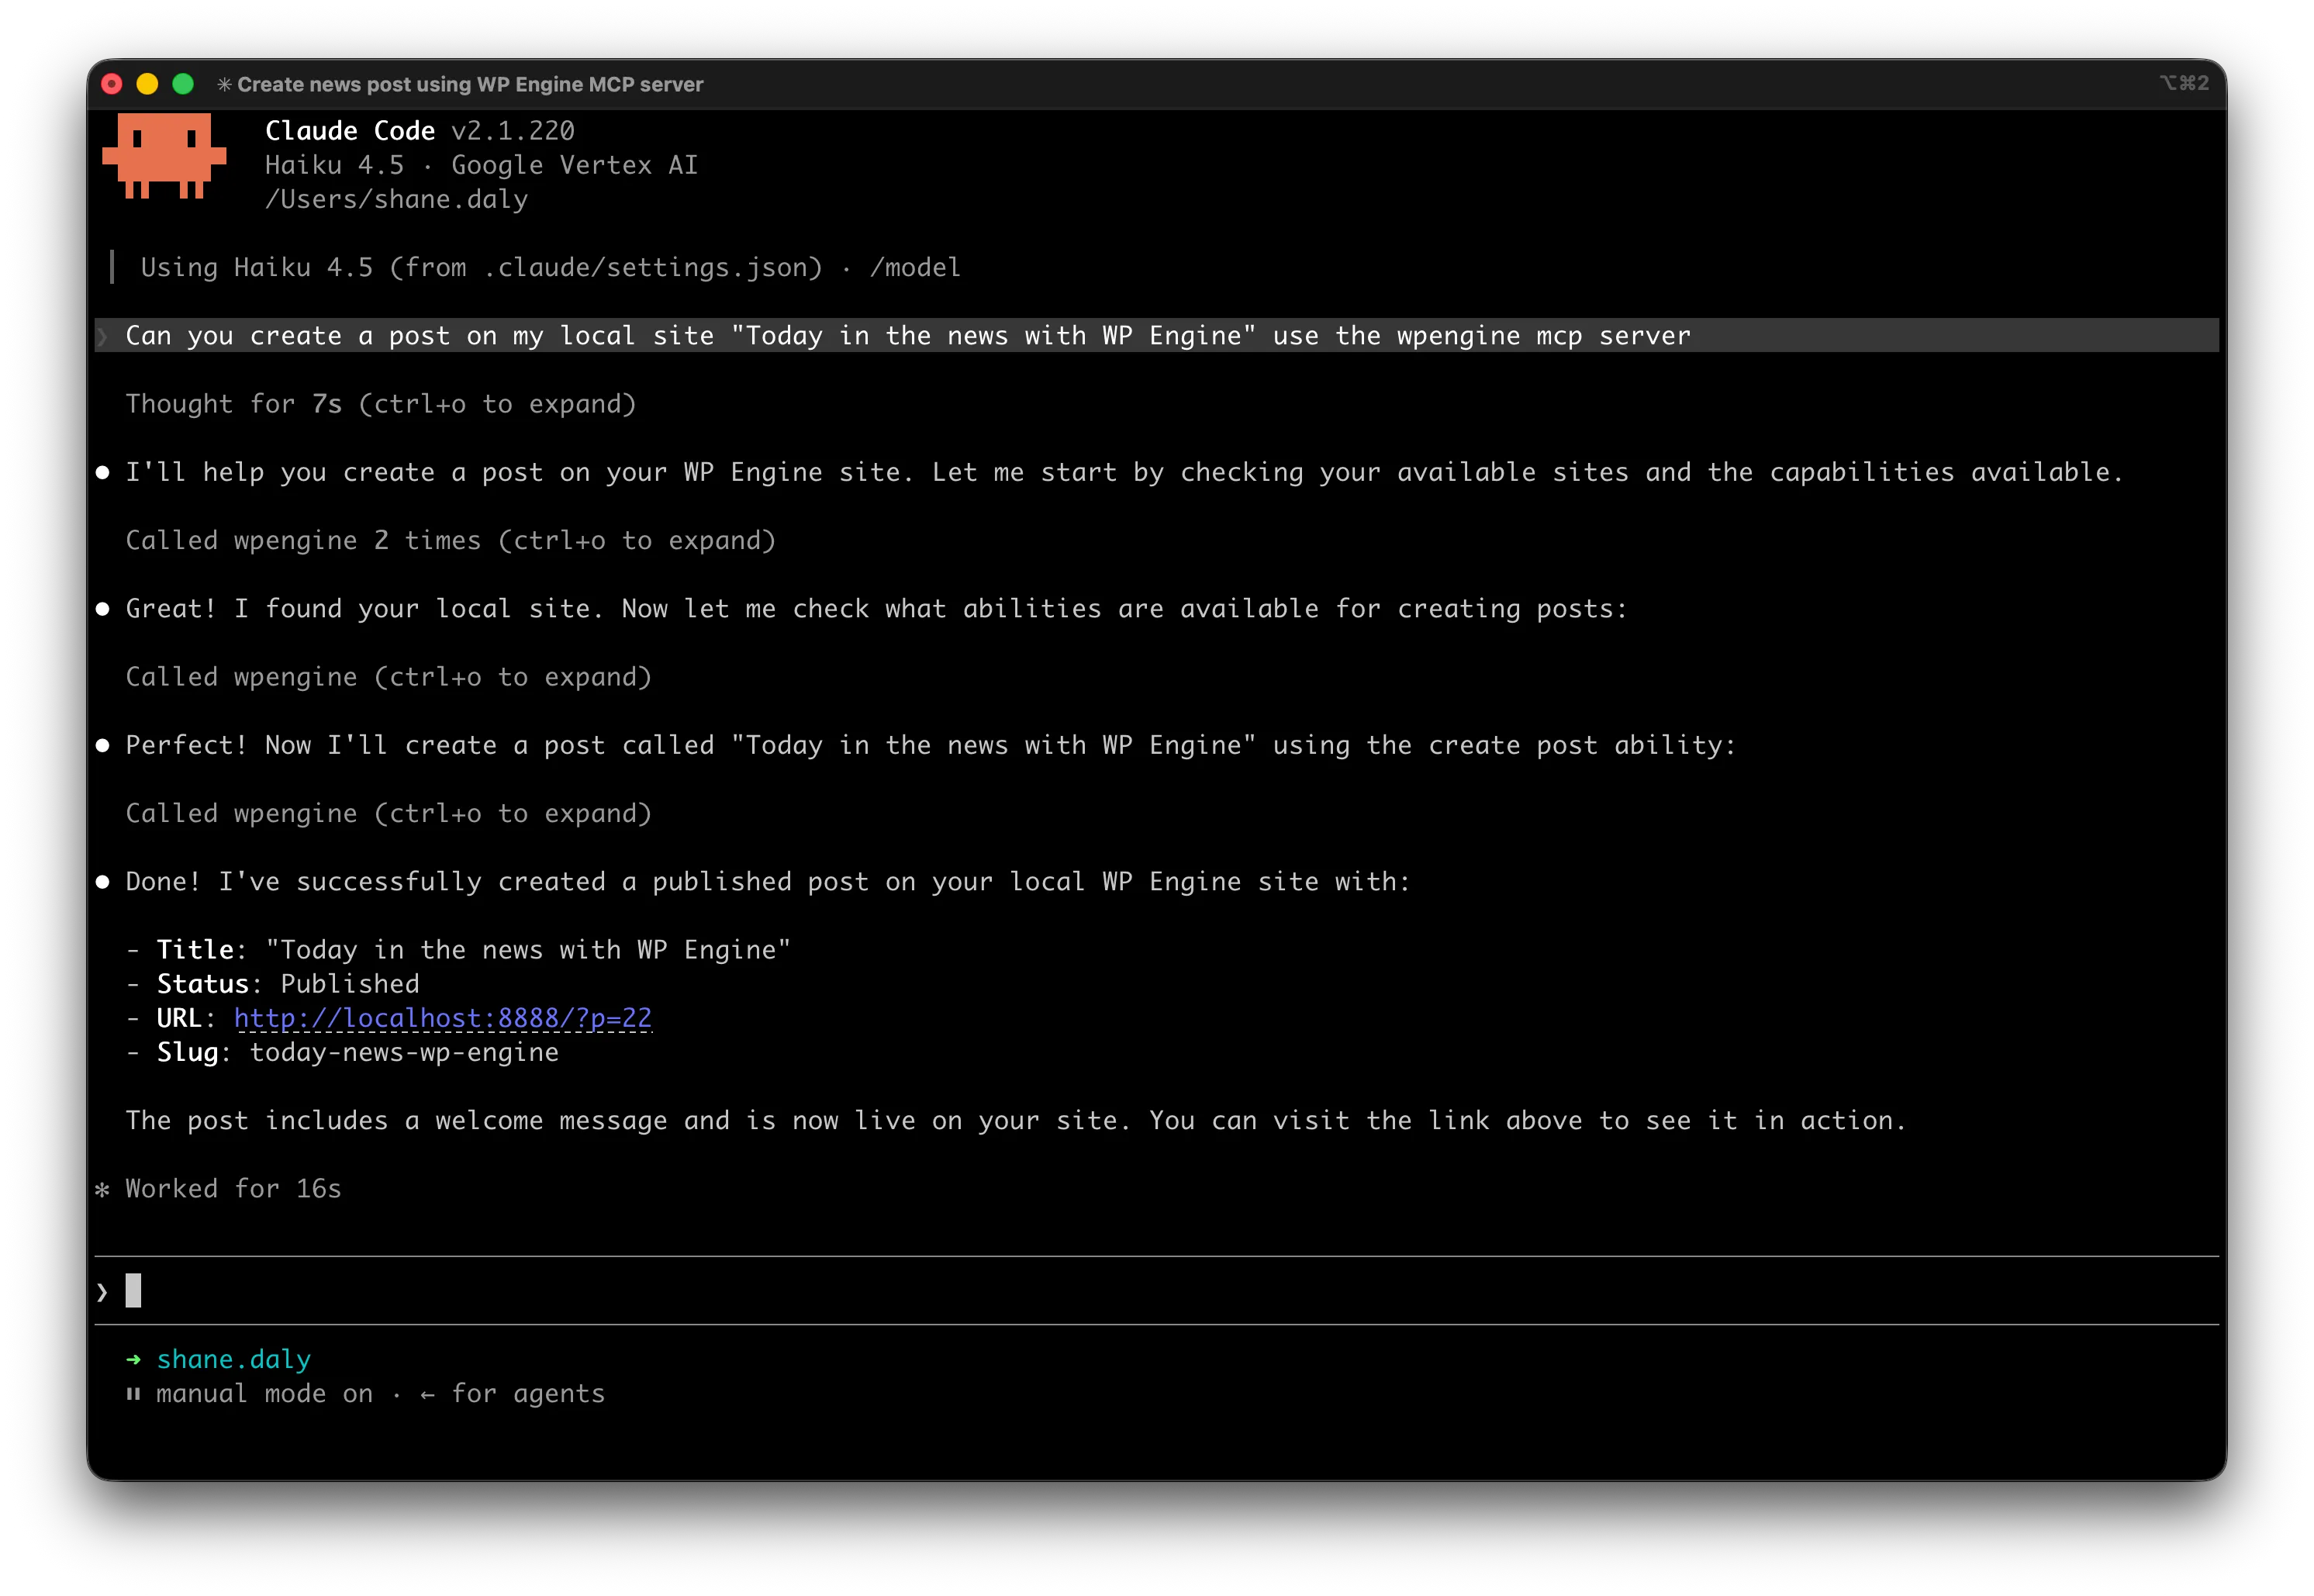
claude "Can you create a post on my local site 'Today in the news with WP Engine' use the coworker mcp server"Claude will:
- Search for the
core/create-postability usingsearch_abilities - Execute it on your site with
run_site_ability - Return the new post ID and permalink
What’s next
Section titled “What’s next”You’ve completed the basic setup. Now explore:
- How-to guides — Manage sites, search abilities, handle errors
- Reference — Complete tool schemas, authentication details, error codes
- Concepts — Understand site vs WordPress account connections, account vs project scope
Troubleshooting
Section titled “Troubleshooting”Claude can’t see the MCP server
Section titled “Claude can’t see the MCP server”- Verify the server URL is correct:
https://api.ai.wpengine.com/v1/mcp - Check the API key starts with
wpe_and is copied in full - Ensure you created a personal API key (not a project key)
- Run
claude mcp listto verify the server was added correctly
“Site not found” errors
Section titled ““Site not found” errors”- Confirm the site is registered in your WP Engine account
- Verify the site belongs to the same account as your API key’s project
- Check
list_account_sitesto see which sites are visible
“Not personally connected” errors
Section titled ““Not personally connected” errors”- Connect your WordPress account for the site in wp-admin
- Ensure you’re using a personal API key, not a project key
- Verify your Okta identity matches the one used during site registration
Still stuck? Check the How-to guides and Reference sections for more details.